
View visit report at the customer
Design visit report dynamically
Overview and functionality
With POLUMANA® visit reports, you can summarise the results of a customer visit in a simple and structured way. You can view the recorded and approved visit reports at any time within the customer in the Documents / Timeline tab. The standard entry form can be customised to your requirements. You also have the option of customising the entry form for the visit report completely freely via “form.office.com”. More about this in the chapter “Dynamic creation of visit reports“.
 Please note that visit reports can only be entered if an appointment has actually been entered for this customer and this appointment is not in the future. If you enter a shopping basket, a customer appointment is automatically created in the background!
Create visit report
To enter a visit report, open the main menu and select the “Visit report” submenu. All visit reports are now displayed. It is now useful to filter the visit reports by date. You also have the option of selecting by visit reports that have already been entered. To do this, select the filter option “Visit report available”.
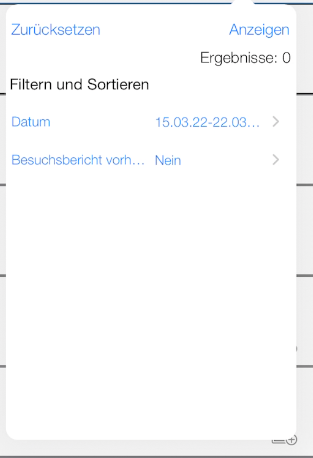
Once you have filtered the desired date range, you can use the “Minimise” and “Maximise” arrows to select the week and days in which the visit reports are to be recorded.
| iOS | Function |
| Minimise – Collapse the sub-items | |
| | Maximise – Expand the sub-items |
 | Create visit report |
 | Visit report has been created |
 | Release visit report |
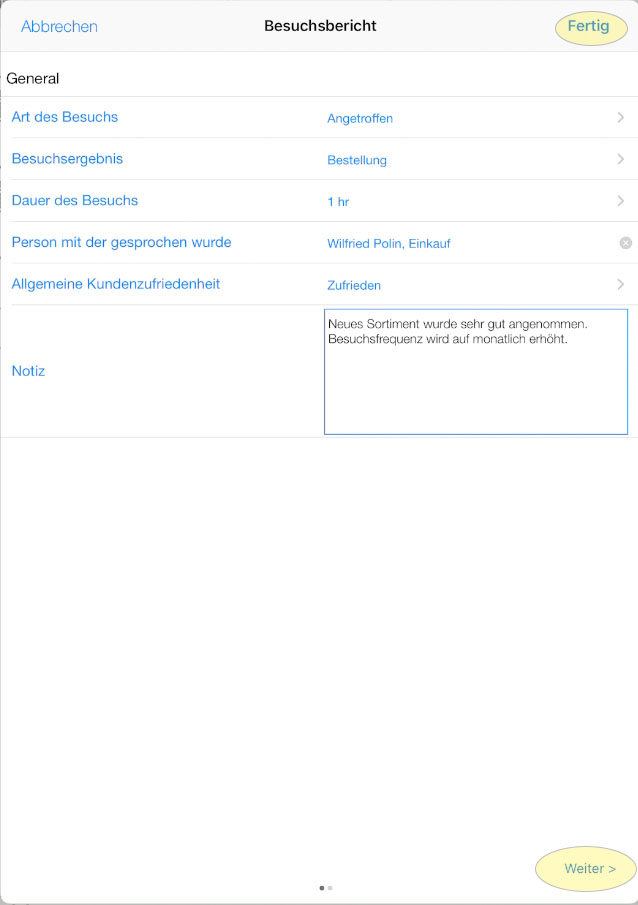
To create a visit report, tap on the “Enter” icon to the right of the desired customer. The form for entering the visit report opens. As already mentioned, the input fields can be customised.
Now enter the fields. Depending on the configuration, several pages may be available for selection. In this case, tap on the “Next button” at the bottom to go to the next page. Complete the entry by clicking on the “Done” button.
Release visit report
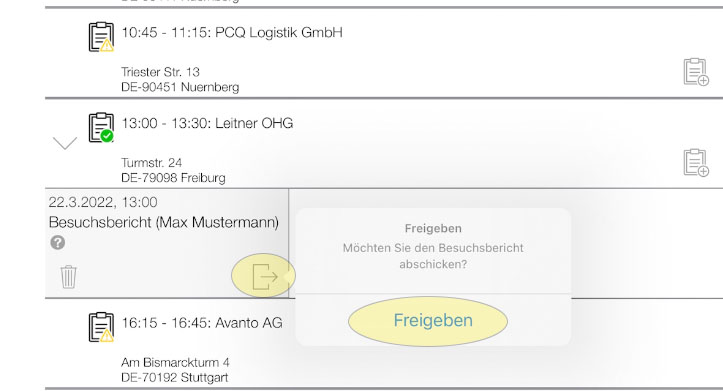
The visit report has now been entered. The next step is to release the visit report. The visit report will not appear within the customer until it has been released.
Now open the customer and click on “Release visit report”. A release dialogue appears, which you confirm.
View visit report at the customer
As soon as the visit report has been released, it is sent as a message. With the next update, you will see the visit report within the customer in the “Timeline/Documents” tab.
Dynamic creation of visit reports
The dynamic design of a visit report within Microsoft forms.office.com is intuitive and user-friendly. In addition, extensive help is available within Microsoft Forms.
The basic procedure for designing your own visit report is as follows:

You can find step-by-step instructions on integrating a dynamic visit report in the chapter “Creating dynamic visit reports”.
